Showing posts with label Alpha Stamps. Show all posts

Sunday, November 29, 2015

Santa's Sleigh Candy Holder


Hello all you amazing crafter's out there. Will you believe that it is already time for another amazing kit from Alpha Stamps???

The first kit is the Santa Sleigh Kit and the second kit is the Santa Sleigh Add-On Kit.

Well I dug right in and got started with my Tabletop Sleigh. After I picked my papers I used this awesome template to pre-cut out the parts for the sleigh base. Just trace around on the Christmastime paper you want and cut it out! 


Here you can see how it will fit onto the sleigh.... but I didn't glue them down yet until after I painted my chipboard pieces. 


Here I covered all the parts not covered with paper in gesso. Gesso primes the chipboard so you can paint on it and it will show up correctly or not get absorbed into the chipboard. 


While that was drying I couldn't resist upping the pinecone game and getting a little DIY with the foliage on my sleigh. 


So I used the Sizzix Dies created by Tim Holtz to die cut out foliage and pinecones!


I inked the edges of the pine cone and followed the video Tim did when this die came out on YouTube! 

For the foliage I pounced the Distress Paint (for the holly leaves I used Mowed Lawn and the rest I used Peeled Paint).


Once that dried I played around with my green ink pads that had and rubbed ink into the areas that didn't have paint. The paint will act like a resist. 


These pine needles got a coat of Peeled Paint Distress Ink and jus the two colors of ink.


Then while those got set aside I painted the rest of the sleigh. 


Then I got to rolling the pinecones. 


Next I pulled out a wreath and sprayed it green with some ColourArte spray I have in my stash called Spanish Moss.  


I used stars form the    to add to the wreath after I used some trim the the kit to make a bow. 


So here is the final look. I am trying hard to not eat all the chocolate but this sleigh makes the best desk or coffee table piece.


Just to give you an idea it holds a whole bag of those Lindor Truffles! 


Here you can see the build up of the foliage I made and extra additions of these fun Small and Medium Pine Cones. 


I also decided to coat the pinecones and the wreath with a little gesso to make it look like snow. 


I also used Sweeper Fringe on the back of the sleight o give the top a nice classy look. 


So what are you waiting for head on over and get your kits now!


Items Used:

Friday, November 20, 2015

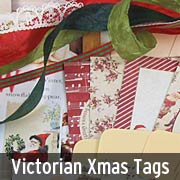
Victorian Christmas Tags in a Box

So there is a new kit up over at Alpha Stamps


It is all about Christmas tags. 

In case you want to join there is a tag swap going on too!

I started with this box for the base of the project! Then I used lots of items from the new kits Victorian Christmas Tags and the Advent Calendar Add-On.


For the tags I used some of the new charms from the Santa Sleigh Silver Charm Set, ribbon and flowers from A Victorian Christmas - Rudolphs Nose Paper Flowers.


I went with the tags first and sprinkled some Distress Paint and then just layered up images and and cut outs from the kits and collage sheets. 


I had fun cutting out some images from some of the collage sheets Kriss Kringles, Winter Kids, Christmas Favorites, Christmas CutiesSnug in Their Beds, Santa & Children, Holiday Words & Cards, and Snow


For the front of the box I used the gold leaves from the A Victorian Christmas - Red Stocking Paper Leaves, Miniature Pinecones Picks, ribbon from the Advent Calendar Tags Ribbon SetWired Pine Needle Stems to make the wreath, and the Layered Victoria Scrolled Border


Here is how I made my wreath. 


I inked all my edges too with Vintage Photo Distress Ink to make everything look vintage. 


And here are the tags in the box. 


Remember to check out whats new in the store and the new kits! 


Saturday, October 24, 2015

Hen House

There is a new kit in town. It is all about some Country Tea too. 

Alpha Stamps Current Kit

So I decided to play around with a hen house or is it henhouse! Can you believe this little home for chickens? The base of it is House Box Shrine Kit.


I started with putting the house together and covering it with gesso.


I cut out some of the new French Wallpaper Collage Sheet to fit the inside and out of the house.


Then I covered the edges with Brushed Pewter Distress Paint.


I love how soft the colors look.


Then I moved onto the Black Chipboard Rooster included in the kit. I wanted a country patina look so I got to layering. 


I started with Tarnished Brass. 


Then I went over it with Spiced Marmalade.


I used my finger to add a little Broken China, once it dried it blended in well. 


While the rooster was drying I added the multi medium at the bottom of the house shrine so I could add some sand on the bottom like gravel on a farm!


I decided to add some Inka Gold around the edges and my extra chipboard pieces got some too. I used a crown and birdcage from the Steampunk Shape Set.


I added some black paint on everything just for an edgier look. 


After everything was put together here was my outcome. 


These little ladies have their own room!


I thought the crown of the cage was a fun touch.


And they even have their own plates from the French Wallpaper Collage Sheet! 


I added this strip of wallpaper to the roof as well as some paper from the Provence 6x6 paper pad from the kit.


I added a little bit of the Inka Gold on the Rooster to add a little bit more texture. 


So now these ladies have a new home! For a list of the products I used click here!


So check out the new kits in the store